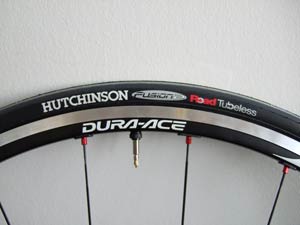
 The future? |
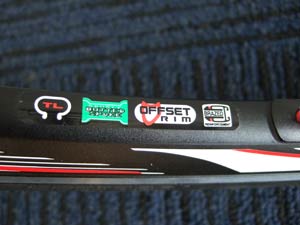 Lots of logos |
Hutchinson Fusion 2 Tubeless 700×23 £34.99 each
Shimano WH7850SLFront £239.99, WH7850SLRear £299.99
It has been a long time coming, but road tubeless is here. Not only is the Shimano WH-7850 wheelset available, but both Fulcrum and Campagnolo have dual-use tubeless/tubed rims on the way for ’09. The tyre most likely to find its way on to any one of these is Hutchinson’s Fusion 2 clincher, which comes in tubeless and tubed versions with the former carrying a 70g weight penalty, this mainly from the layer of butyl needed on the inside of the tyre to make it airtight. It was ridden by Philippe Gilbert to victory in this year’s Het Volk classic and was said to have impressed the Belgian strongman’s Francais des Jeux team mates with its rolling resistance, grip and resistance to punctures.
We are testing the Fusion tyres on the Shimano wheels, which run current model Dura-Ace hubs laced radially at the front and cross-two at the rear with bladed spokes. The key requirement for use with tubeless tyres is, of course, a non-perforated rim. The Shimano version locates the nipples in threaded sockets that are brazed onto the rim to avoid the need to penetrate it.
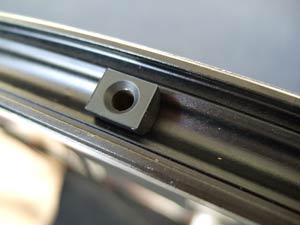 Bung seals valve hole |
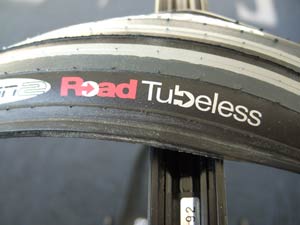 Wot, no inner tube? |
The rim’s inner face has the usual raised wall with hook form to hold the specially-shaped bead. As with motor vehicle tubeless tyre practice, there is a small lip just inboard of this; the bead pops over the lip when inflated. The lip both aids the air seal and keeps the bead in place when the tyre is deflated, the effect being secure enough to allow a tubeless tyre to be ridden flat.
It also makes tyre installation a potentially more awkward task than with a conventional tyre, although on the plus side there is no tube to wrestle with and risk pinching. Fitment is in fact much as per normal but minus the tube. It does help to lubricate the tyre bead with soapy liquid prior to fitment. Hutchinson provides a special hollow tyre lever call STICK’AIR, which can be filled with liquid soap. A small sponge tip allows this to be applied to the bead without too much escaping and making a mess.
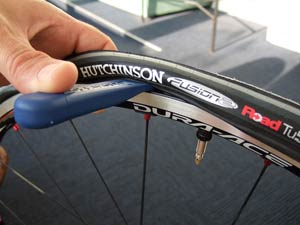 Special tyre lever used for removal |
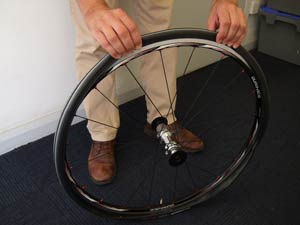 Start opposite valve to fit |
To fit the tyre, the first bead is installed as usual. Care has to be taken to ensure that the bead sits alongside the rubber plug that sticks up from the valve. If not, there will not be a good seal for initial inflation. The instructions suggest that this first bead should be seated over the lip mentioned above before the second side of the tyre is installed, but in practice this is almost impossible. In any case, the second side goes on easily enough, starting diametrically opposite the valve.
As you approach the valve the bead will go taut before it can be pressed over the rim, in a way that will be familiar to all clincher users. The fact that the bead has been lubed only makes matters worse, but to get the last bit over the rim, the bead must be pushed directly into the well all the way around. This was not too hard the first time we did it, a bit easier the second and pretty simple the third, and is in any case the correct way to fit any clincher.
Having made sure both beads sit alongside the valve bung, not running over the top of it, the tyre must be inflated. While our first attempt succeeded immediately, the second proved troublesome even with a track pump until we got the beads properly seated. The third attempt was made with a frame-fitting hand pump; again, seating the beads next to the bung proved the critical factor and the tyre inflated very nicely after that. Inflation is complete when each bead ‘snaps’ over the lip and may require a good seven bar of pressure.
Removal is even easier, requiring only the assistance of the STICK’AIR lever. The beads pass over the lips easily when pressed from the outside. How do the tyres perform? Watch this space.
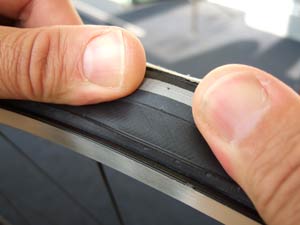 Tyre with bead seated over lip… |
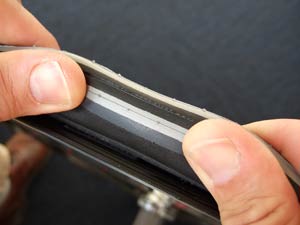 … and unseated |


