Fixed wheel may be simple, but many cyclists new to the discipline find getting the back wheel out and back in anything but, especially when it comes to adjusting chain tension. Here, then, is RCUK’s guide to doing all three.
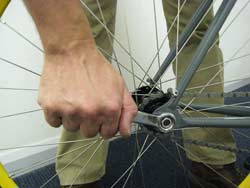
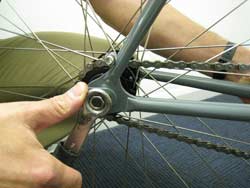
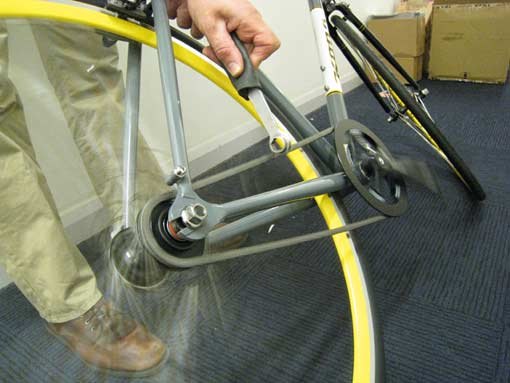
1: Undo both nuts enough to remove wheel
|
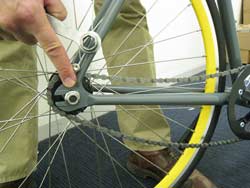
2:Slide wheel forwards to front of slot |
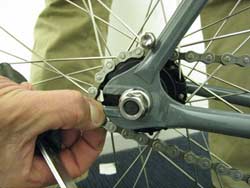
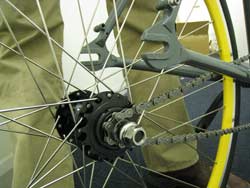
3:Pull chain off sprocket to the outside…
|
4:…so it sits around spindle |
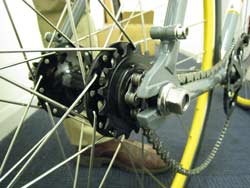
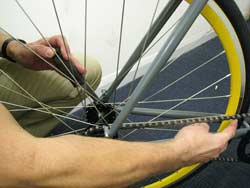
5:Pull wheel back and drop down from frame
|
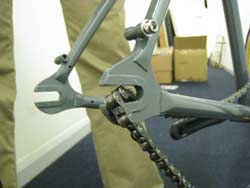
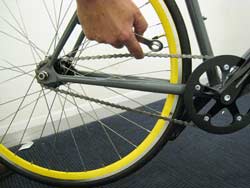
6:Hook chain over end to keep out of the way |
Step one to wheel removal is, of course, to undo both wheel nuts (1). They don’t have to come off completely; just enough to allow the wheel to move freely. This will allow you to push the wheel as far forward in the track ends as possible (2). If you have forward-facing dropouts, the wheel will come straight out of the frame and your problems will be over – for now. If your frame has traditional ‘track ends’ with a horizontal slot, this should leave enough slack in the chain to allow you to slip it off the rear sprocket (3) and drop it onto the spindle (4). This, being of small diameter, will then leave you enough slack to pull the wheel backwards out of the ends (5). If it won’t quite exit the ends, unship the chain from the underside of the chainring to give a little extra room for manoeuvre. To keep things tidy once the wheel is removed, hook the chain in the slot (6) and, if you had to unship it, put it back on the chainring.
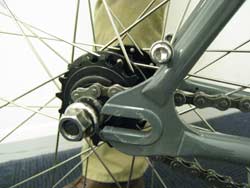
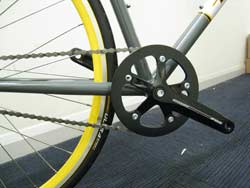
Refitting the wheel is, naturally, the same process done in reverse order. If you are building a new bike or fitting a new chain, it is bad form to cut it so short you can’t get it over the sprocket as shown in pic 3. Once the wheel is back in the frame and the chain in position on both sprocket and chainring, pull the wheel back until the chain is taut (8). Lessen your pull on the wheel a little and you will see the chain drop slightly – about 5mm is plenty. Tighten the drive-side tracknut (9). Sighting along the wheel, pull or push the opposite side of the rim sideways until it is centred in the stays, then tighten the left-hand nut (11).
Now turn the cranks, watching the chain to see if it goes taut at any point. Since almost all chainrings are slightly concentric, this is sure to happen somewhere unless you happened to start the whole wheel nut tightening process with the cranks aligned at the chain tight spot – in which case, the 5mm slack you left – didn’t you? – will be spot-on.
If, however, you find a tight spot (12), firstly make a mental note of the crank orientation and then slacken the drive-side wheel nut. This will most likely allow the chain to go slack. If you get a maximum 5mm of slack, great; tighten the wheel nut and undo the nut on the non-drive side (13). Pull or push the opposite side of the rim sideways until it is centred in the stays, then tighten the left-hand nut (14).
If you got more than 5mm slack when you slackened the drive-side nut, push the opposite point of the rim sideways to the right to reduce the slack to the desired 5mm, then tighten the drive-side wheel nut. Now perform steps 13 and 14.
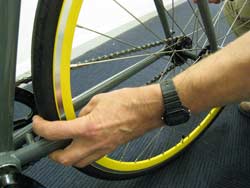
This should leave you with a centred wheel and 5mm chain slack at the tight spot. Remember that mental note you took of the crank orientation at the newly-found tight spot? Position the cranks thus when refitting the wheel and you will avoid the need to go through step 12 to find it again. Finally, hold the cycle with the rear wheel off the ground and, keeping fingers well away from the chainring and chain, turn the pedals to get the transmission spinning. Set the cycle on its side and, if the chain is properly tensioned, it will not try to jump sideways off the sprocket even if tapped sideways with the spanner. Make sure the nuts – drive-side a little more so – are correcty tightened and ride away.
7:Position spindle at mouth of slot |
8:Pull wheel back until chain is tight |
9:Tighten drive-side nut… |
10:…leaving 5mm slack |
11: Centre wheel in stays and tighten left-hand nut |
12: Turn crank until you find tight spot |
Spin wheel and tap chain |

