Setting up personalized training zones fast-tracks your improvement and needn’t involve expensive lab tests. Here’s a simple real-world test that helps you to do it.

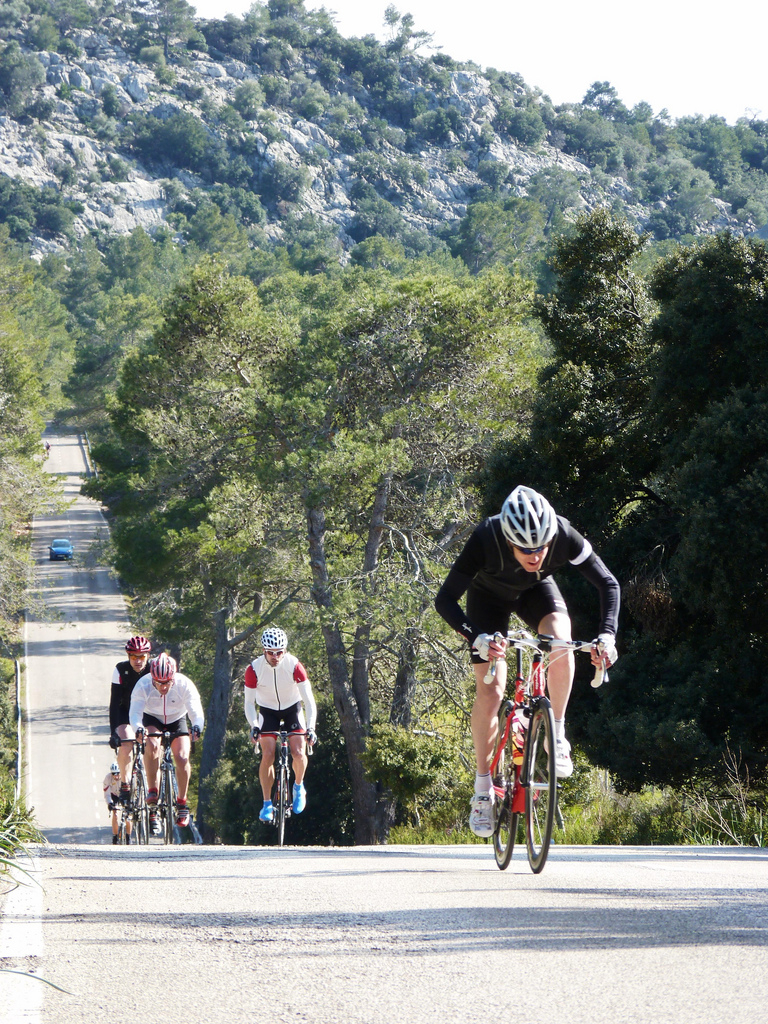
- Performance testing is essential at the outset of your training programme. Pic: La Fuga travel.

As we identified in part 5 of this series, training in pre-determined intensity zones is highly beneficial both in physiological terms and in structuring your training to maximize improvements. As training zones are expressed as a percentage of maximum heart rate, the next step is to calculate your personal training zones by predicting your own maximum heart in order to apply them to your training rides.
I say ‘predict’ your max heart rate because the good news is you don’t have to try to actually achieve it. Although lab and road tests which push you to the very limits of your performance and record your heart rate at that intensity do exist, maximal efforts of this nature are not without risks to the relatively untrained rider and the results would almost certainly not be a fair representation of max heart rate due to the high levels of motivation (to say nothing of physical effort) required to push yourself to the limit. Much better is to predict your max heart rate in a more real-world ‘threshold’ test which you can perform in your own time without the help of white-coated lab technicians and machines which keep beeping at you.
Threshold is the intensity which is particularly familiar to time triallists, as it’s the maximum pace they can sustain for a one hour event. You’ve probably heard of time trial riders trying to break ‘the hour’ for a 25mile TT. It’s a pretty safe bet that if a rider performs to the limit of their abilities and just scrapes in under the hour for a 25mile TT at the very point they feel they can no longer turn the pedals, the average heart rate over that hour would be a fair reflection of their ‘threshold’ heart rate. This in turn represents 89% of maximum heart rate so once you know your ‘threshold’, you can predict max heart rate (MHR) and therefore calculate your training zones with some degree of accuracy. Don’t worry if you aren’t very good at maths; there are plenty of on-line percentage calculators you can use to run the numbers for you.
So let’s look at an example:
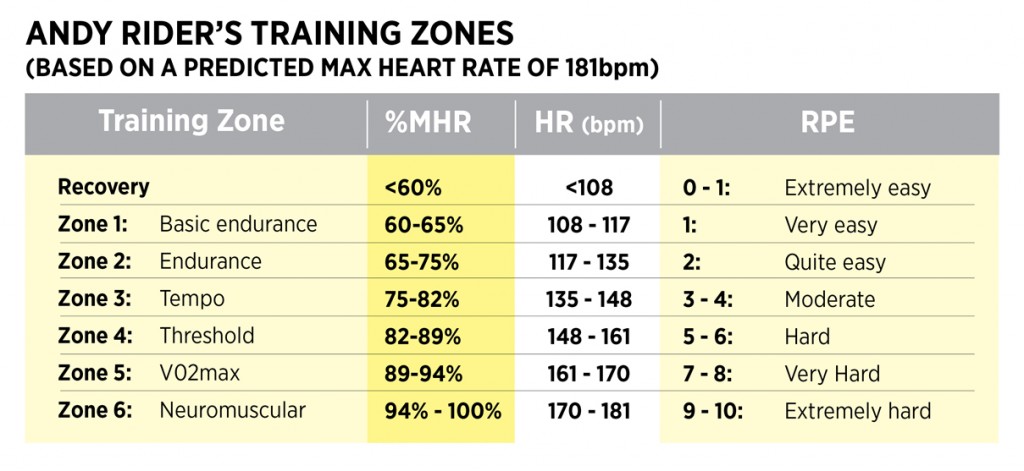
A sportive wannabe called Andy Rider wants to start training with a heart rate zone system so does a test to determine his threshold heart rate, which he establishes is 161bpm. Using the training intensity zones table we gave you in Part 4, he can calculate his predicted max heart rate training zones thus: 161 represents 89% of max, therefore his predicted MHR is 181bpm. So his personalized training zones look like this.
That’s the easy bit. Now for the hard bit, the test itself. Even though you’re not going to be anywhere near your maximum heart rate, threshold tests are still tough. Don’t undertake one unless you are already quite comfortable riding at a hard pace for an hour. If you’re in any doubt as to your ability to perform the test, get yourself screened by a doctor first.
You’re going to be riding at the highest pace you can sustain for an hour and this is both mentally and physically very demanding. You can also expect to get it wrong at least once, probably twice before you get a true representation of your threshold heart rate, but that’s ok. You’ll learn a lot about your current level of ability and pacing strategies as well as what threshold intensity actually feels like in doing these tests. All of which will be invaluable experience when training towards your first sportive.
So what do you need for the test? Firstly, a stretch of road that you can ride on for one hour with no interruptions. Ideally it will be laps of a short ‘circuit’ but a straight-out or out-and-back course will be fine so long as you don’t have to stop for sharp bends, junctions, traffic lights etc. Also try to make it reasonably flat. Slight rolling hills are acceptable but try to avoid anything with steep hills as they’ll make pace judgment that much more difficult. Secondly, you need a heart rate monitor and the knowledge of how to use it. A fairly basic model will do so long as it records max and average heart rates and preferably has a timer function.
Test protocol
When you’ve identified the course, ride there at easy pace, gradually lifting the heart rate and then complete five or six maximum effort, short sprints for 10 seconds each to get your legs moving quickly and make sure you are nicely warmed up. Spin easy for a couple of minutes then start the test. Set your heart rate monitor to record your data and simply ride at the fastest pace you can sustain for one hour.
Pacing
Almost every rider who undertakes this test for the first time makes the mistake of going out too hard and blowing up well before the hour is up. Even experienced time triallists make this mistake, so don’t fret, you’re in good company. At the other end of the scale there’s being too conservative and realizing you have plenty of energy left near the end and finishing too fresh. A good strategy is to start conservatively and build your pace gradually with regular checks on your timer to stay aware of how far into the test you and how much effort you are making. The key is staying just on the right side of blowing up; it should feel hard but not impossibly so.
How do I know when I get it right?
Mark yourself out of 10 at the end of the test. If you finish the 60mins on the point of collapse but have managed to sustain a good solid effort throughout you’ve done a good test. Be honest in your appraisal – if you mark yourself at 8.5 or above then the result is valid and you’re done. Any lower and you need to return to retake the test.
Confirmation test
When you feel you have a valid test result, it’s easy to confirm it. Let’s say you recorded an average HR of 162 for the 60 minutes and felt it was about the best you could achieve. When you’ve recovered sufficiently, return to the course (in as similar weather conditions as possible) and repeat the test. This time you have data to go on. Simply follow the same warm up protocol but this time, in the test itself, use the 162bpm heart rate as a pacing strategy. Stick as closely to it as you can for the ride and you should be just about able to sustain the intensity again. If you can finish stronger and lift it slightly, so much the better, use this revised figure as your new threshold heart rate.
And that’s it. You now have a very reasonable estimation of your threshold heart rate and can formulate your training zones. It might not be 100% accurate but it’ll be close enough to get you started and the training sessions to follow will soon reveal if you need to re-calculate.
Next week we’ll look at how you can use these zones to create a bespoke training programme tailored toward completing your first sportive in good shape.
Part 1: Going for Centuries
Part 2: Breaking down the barriers
Part 3: Goal Setting
Part 4: Intensity
Part 5: Get in the Zone
Part 7: Creating a training plan
Part 8: Weekly training plans
Part 9: Be a better climber
About the author:
Huw Williams is a British Cycling Level 3 road and time trial coach. He has raced on and off road all over the world and completed all the major European sportives. He has written training and fitness articles for a wide number of UK and international cycling publications and websites and as head of La Fuga Performance, coaches a number of riders from enthusiastic novices to national standard racers.
Contact: [email protected]