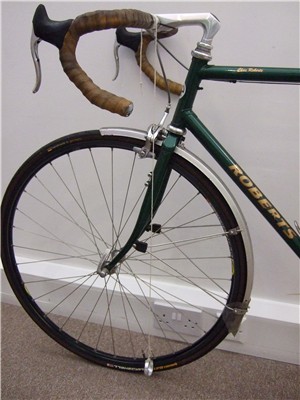
Getting your bikes set up the same
Maybe you have one bike that fits better or feels more comfortable than the others in your stable; perhaps you want your new winter training bike to be set up the same as your race bike, maybe you have a bike set up professionally and want to repeat its settings on the next acquisition… If you have more than one road bike, there are good arguments for ensuring they are all set up to provide exactly the same riding position.
On the face of it, this is not so hard. There is no shortage of ways to measure the relative positions of the saddle, handlebars and pedals, which are what determine seated riding position. Some methods depend on relating everything else to the saddle, others on the handlebars or even the conjunction of top and head tubes.
Essentially, the more accurately this can be done, the better in terms of the end result. Since it is the one constant, non-adjustable datum point on any bike, the most accurate method is likely to be based on the position of the bottom bracket axle and is the method detailed here.
Remember, this is not a guide to setting up riding position from scratch but to repeating it on successive machines. If you have a really good position, measure it as detailed here and you can recreate it on any frame with approximately the right dimensions.
….
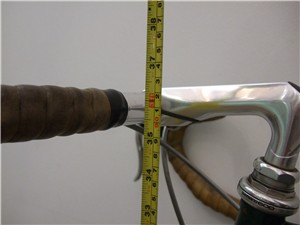
One: measure handlebar height from the ground
For the technique to work properly, you will need a level and even floor, preferrably with a hard surface.
This measurement will allow you to place your bars the same height in relation to the bottom bracket axle.
Let’s assume you ride the same handlebar bend – shape, depth and drop – on both or all machines. If so, then you can measure from the centre bulge and get the same result with any pair of those handlebars. The same is true if the bars have the same height drop but different reach.
If, on the other hand, you have pairs of bars that differ significantly in height drop, you might choose to measure the height of the bar ends if riding position on the drops is most important to you.
Either way, measure from the ground to a specific point on the handlebars, such as the centre line of the bulge. Make a note of the ‘measured handlebar height’.
….
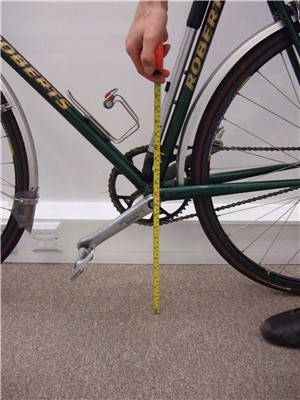
Bottom bracket height
Not much to go wrong with this; measure from the ground to the centre of the bottom bracket axle.
Now subtract this from the measured handlebar height to obtain the difference in height between them. This is your first reference dimension.
Moving to the next machine, simply repeat the process and note the result. If your original bike’s bar height difference was, say 620mm and that of the next machine 635mm, the bars of the second need lowering by 15mm.
….
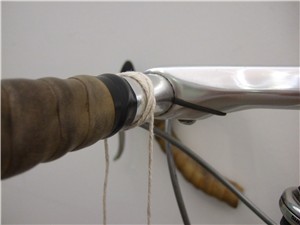
Plumbline placement
For this you will need a plumbline, which you drape over a repeatable part of the handlebars.
If all your bars are the same bend and size, this might as well be the centre bulge. If they have differing reach and you wish to replicate your reach to the brake levers when riding, a solution is to strap a dowel rod to the back of the bars behind the lever hoods and hang the plumbline from it.
This way you will get the same reach to this point, although with non-identical bars the reach to the tops will not be the same.
….
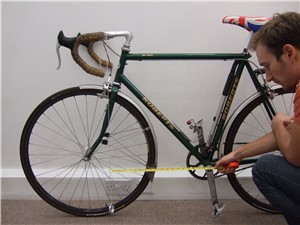
Handlebar horizontal dimension
With the plumbline now hanging from the handlebar of machine one, measure the horizontal distance from it to the bottom bracket axle centre. Make a note of this ‘handlebar horizontal dimension’.
Now measure machine two (or more) in the same way. If you find that its handlebar horizontal dimension is, say, 450mm and that of machine one was 460mm, you need a stem 10mm longer on machine two.
This technique works well when riffling through a box of stems trying to find one the right length.
Used in conjunction with the handlebar height dimension, this will allow you to place the bars precisely in relation to the bottom bracket axle.
….
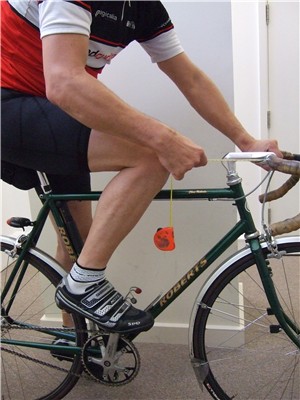
Saddle to handlebar adjustment
Assuming you have the saddle at roughly the right height, perhaps the trickiest dimension to determine is that from the saddle to the handlebars. Even two outwardly identical saddles may differ slightly in the way the padding is disposed under the covering, while any two different saddle models will accommodate the rider’s sit bones in their own way.
For this reason, simply measuring from the nose of the saddle or from some arbitrary point along its length is likely to be inaccurate.
Instead, find your preferred way to sit on the saddle in question and, supported so you can remain that way in the saddle, place one crank near vertical with your foot on the pedal. The only requirement is that the crank be near vertical, since the kneecap provides the datum and the horizontal thigh length does not vary significantly with the crank around vertical.
….
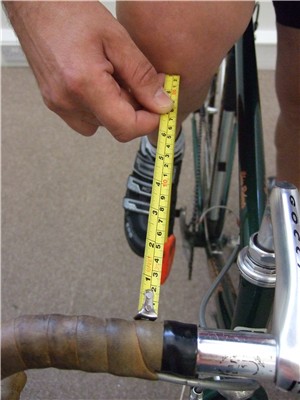
Knee to handlebar measurement
Now measure from the back of the handlebar to the front of the kneecap, with the front wheel aligned with the frame.
Given that handlebar tape varies in thickness and softness, you may need to take a view in pursuit of absolute precision.
If you find that kneecap to handlebar dimension on machine one is, say, 220mm and on machine two is 230mm, move the saddle on machine two back by 10mm to obtain the same reach when in the saddle.
Finally, a word on saddle height. Since no two saddles are identical even of the same model, initial adjustment should be done by measuring from, say the bottom bracket axle centre to the top of the saddle. Fine adjustment can then be done by feel to within 1mm.


