Why you should be paying attention to the torque recommendations on your bike
Ever wondered why you should be paying attention to the torque recommendations of your bike? We explain why
When you mention torque, usually it’s one thing that springs to mind first: power. With all the talk of power meters, functional threshold wattage and maximum output, torque – or how hard you stamp on the pedals – forms a vital part of this.
However, torque has another vitally important role to play on a bike; that of maintenance, setup and safety. Every point on a bike that requires a bolt to attach it to another area needs to be fastened to a particular tightness; which is usually recognised as torque.
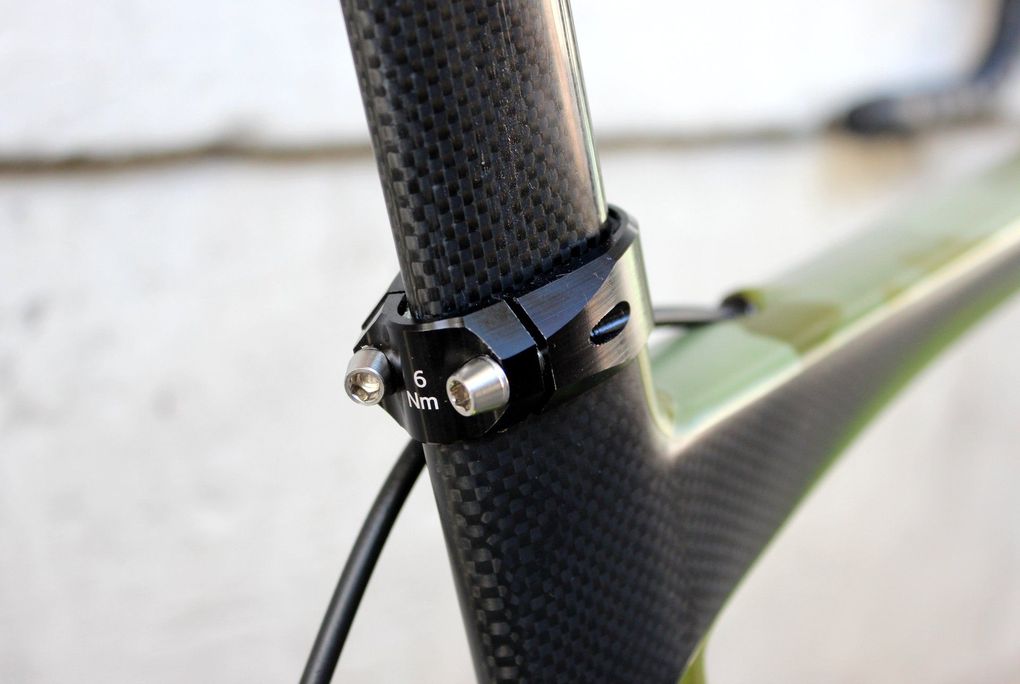
With recommended torque levels appearing in small print all over components and bike frames, it’s high time everyone began to truly understand what torque actually is, and why you should be adhering to those recommendations.
Why should you be paying attention to torque?
What is torque?
Essentially, when it comes to maintenance, torque is the measure by how tightly you fasten two mating things. On a bike, this takes the form of a bolt that screws into the frame or between components, and how tightly that bolt should be attached to its counterpart housing.
Why does it matter?
The simple explanation is that if your bolts aren’t torqued to the necessary levels, they can either work loose or, if you over-tighten, it can damage the two structures being bound together, which can result in complete component failure.
Seth Eckart, design engineer and ride test coordinator at Trek Bikes, says the importance of torque has become more critical in recent years because of the increasing delicacy of components.
“Bicycle companies are using more and more of materials like carbon fibre to save weight, but as a result the components become more delicate,” says Eckart. “Engineers of these products therefore spend a lot of time experimenting with what torque is correct for each application.
“For example, they ask what torque setting is correct for a carbon seat post into a frame so that the frame won’t crack or break the seatpost, but will still hold the components firmly in place.”
On top of that, Jack Noy, technical service advisor at Canyon, explains how over-tightening can damage parts, even if you don’t know it at first.
“If the bolt or fastener is over tightened this can easily damage the fastener itself, either stripping the threads, or permanently ‘stretching’ the threads and bolt, preventing it from being able to tighten securely in the future.”
With bike frames and components made from lighter and more exotic material than ever before, adhering to the manufacturer’s torque recommendations is more important than ever
Why should you use a torque wrench at home?
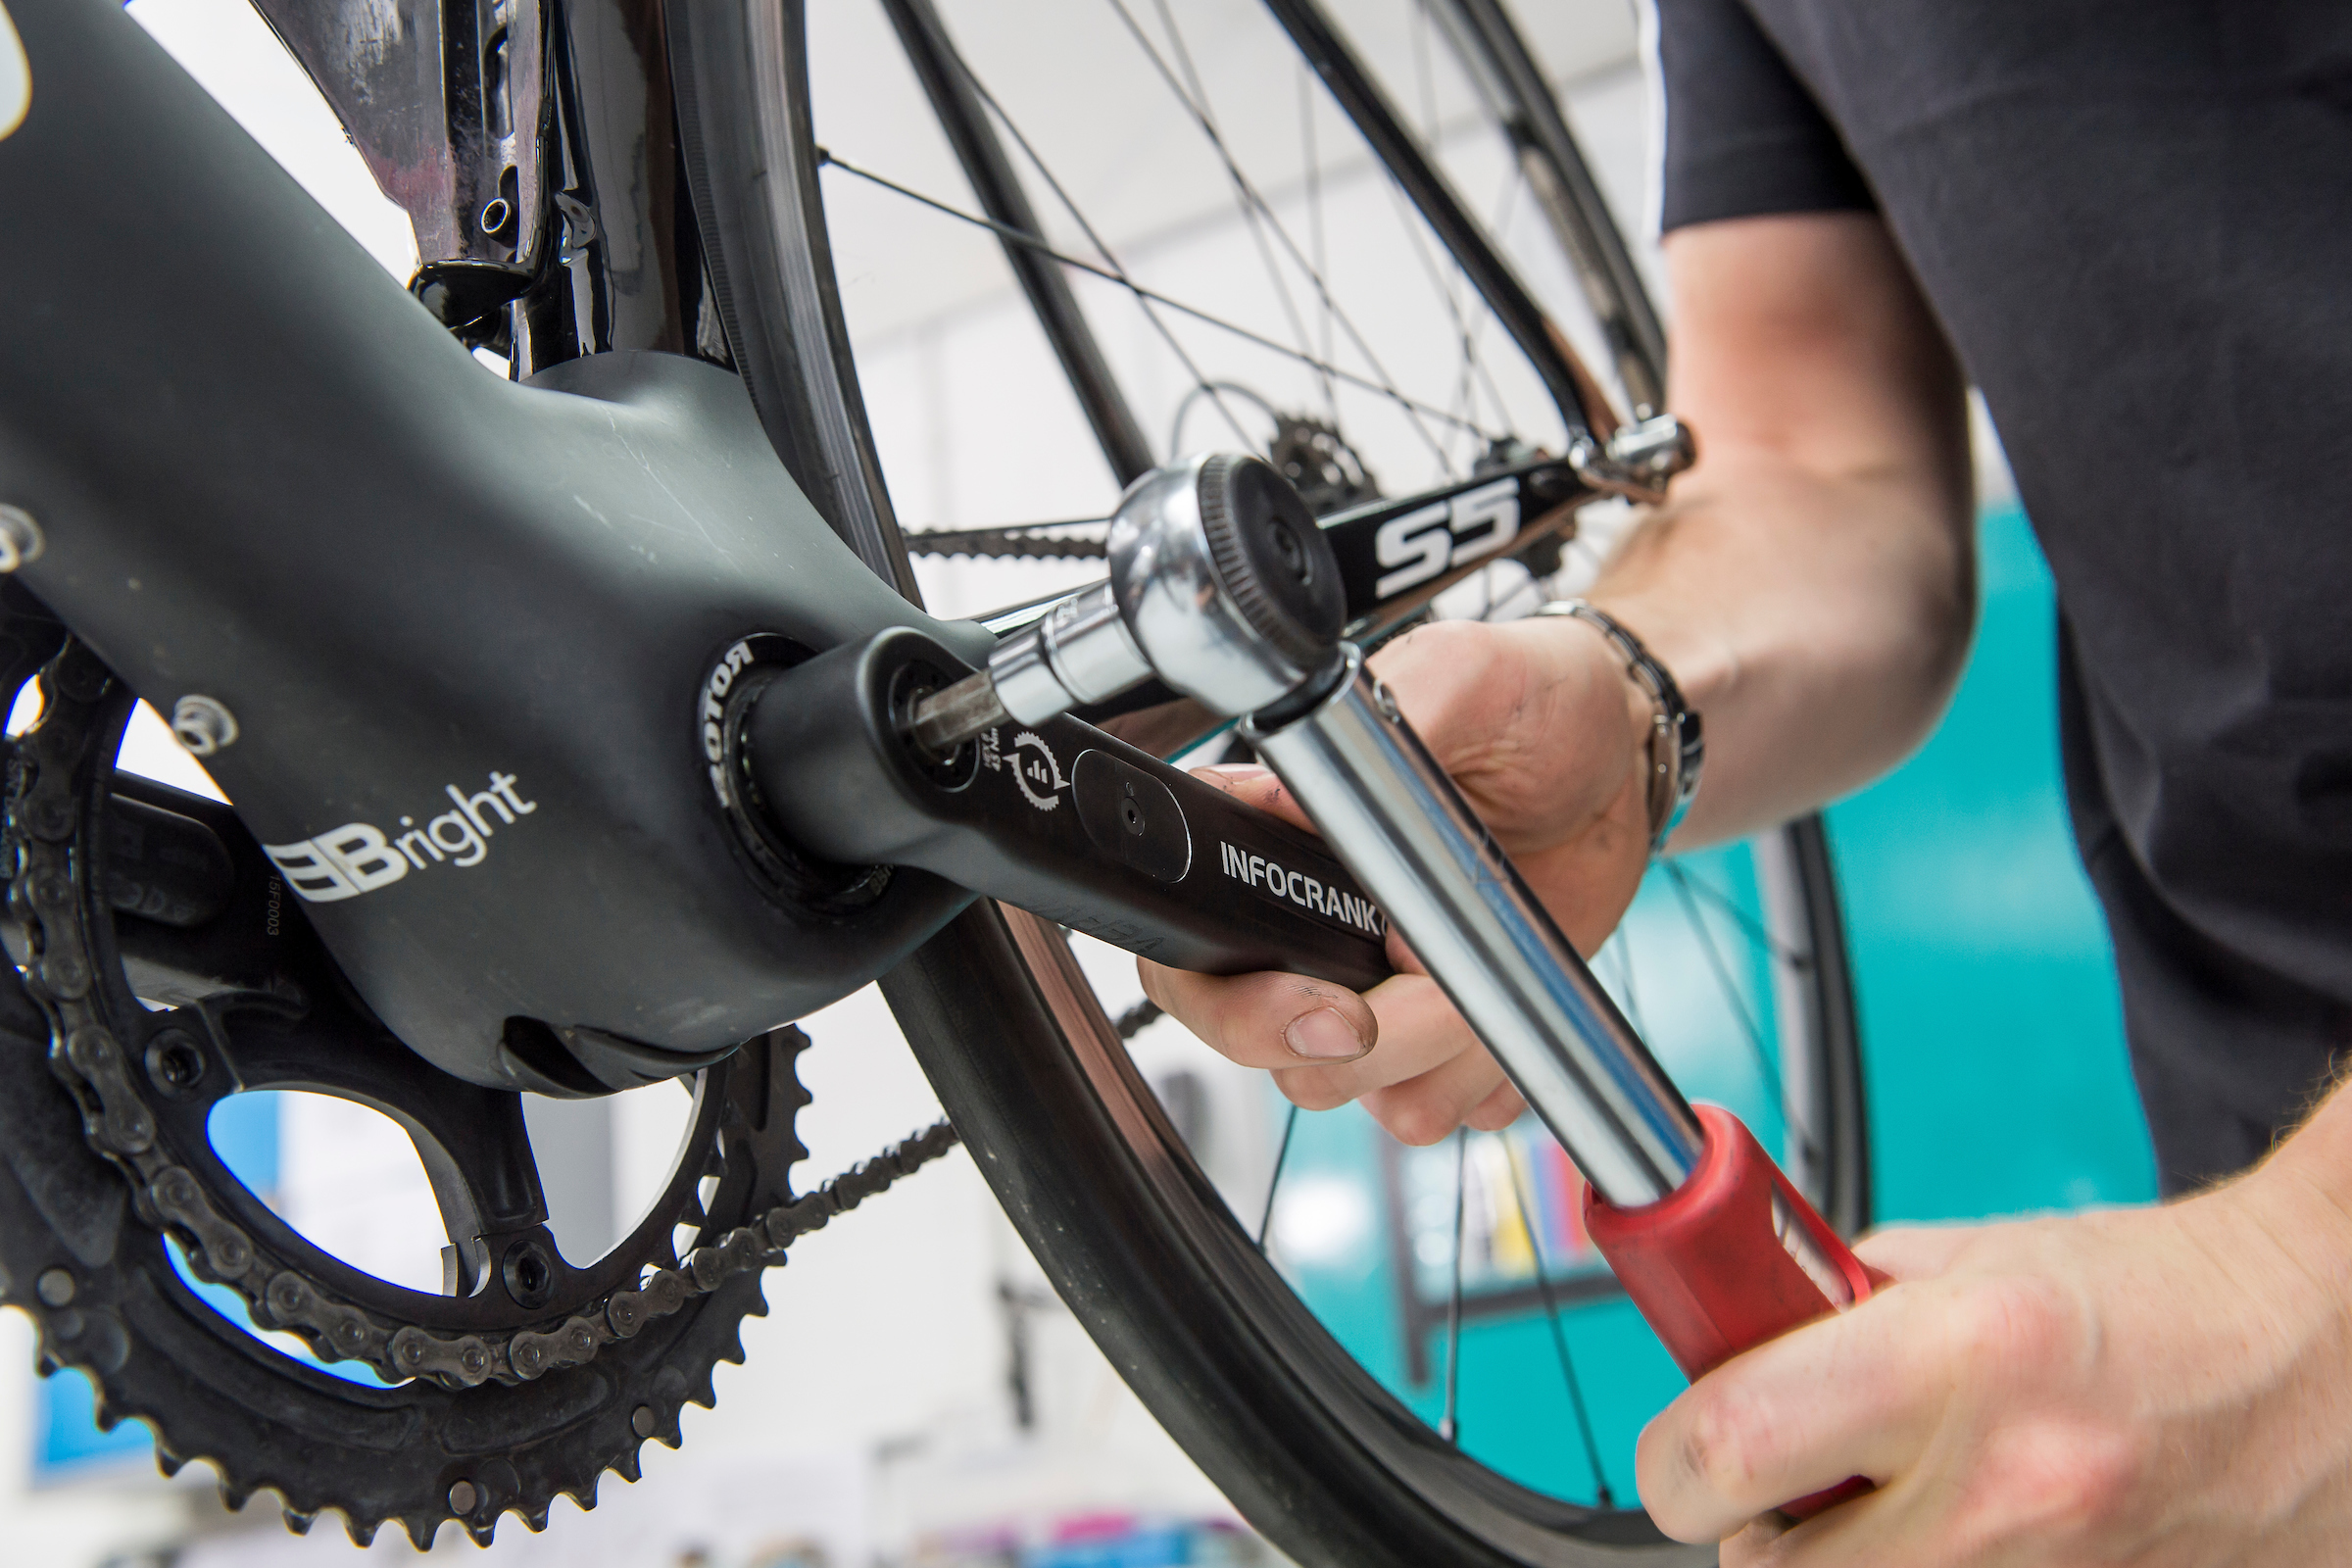
How can you make sure you tightening up the bolts on your bike? Instead of relying on ‘feel’, the easiest way is to use a torque wrench.
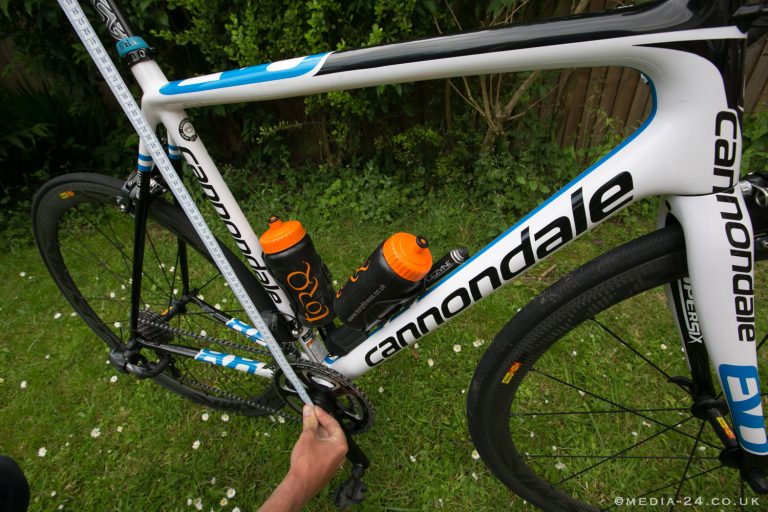
If components on your bike need replacing, or you want to adjust your bike fit by adjusting things like your seatpost height, setback, handlebar tilt and so on, then a torque wrench will ensure you are tightening everything back up to the correct level. However, it’s not just for big adjustments that a torque wrench should be used, according to Noy.
“During basic maintenance the bolts on your bike should be checked from time to time, to make sure the bolts are done up to the torque specifications as they can come loose with use,” he says. “Owning a torque wrench removes any doubt as to whether you have tightened a bolt sufficiently and also prevents you damaging your bike by over-tightening it.”
He adds that, because Canyon is direct-to-consumer in its business model, the onus is on the customer to do some final setup with their bike out of the box. As a result, Canyon supply a simple torque wrench with the bike.
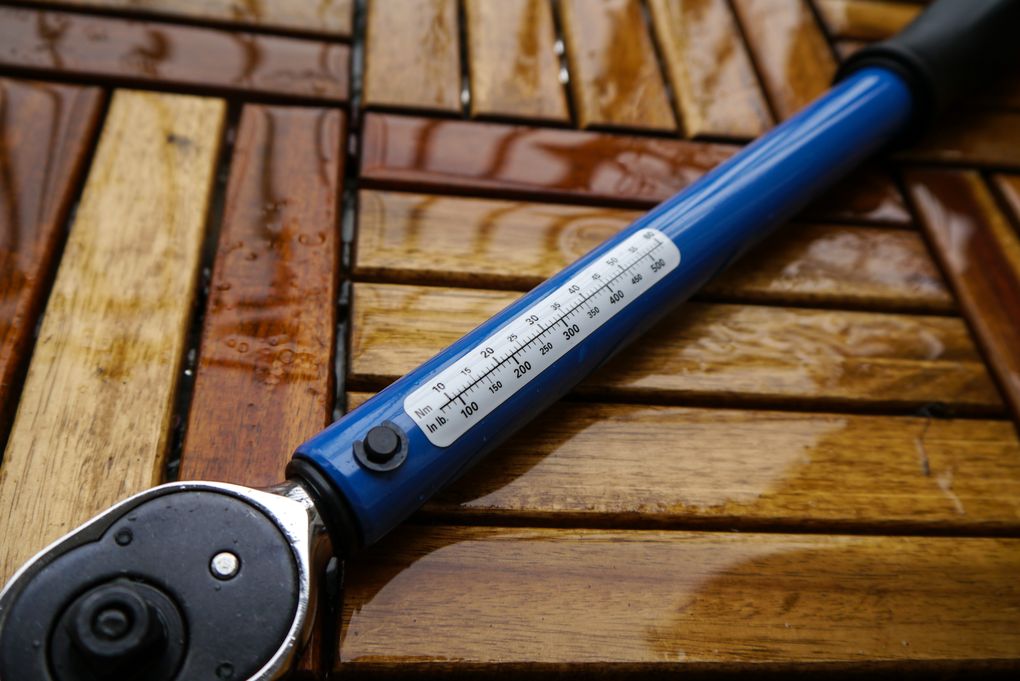
What kind of torque wrenches are there?
Like most things in the bike world, there’s plenty of choice if you want to add a torque wrench to your tool box – and there are pros and cons to each design.
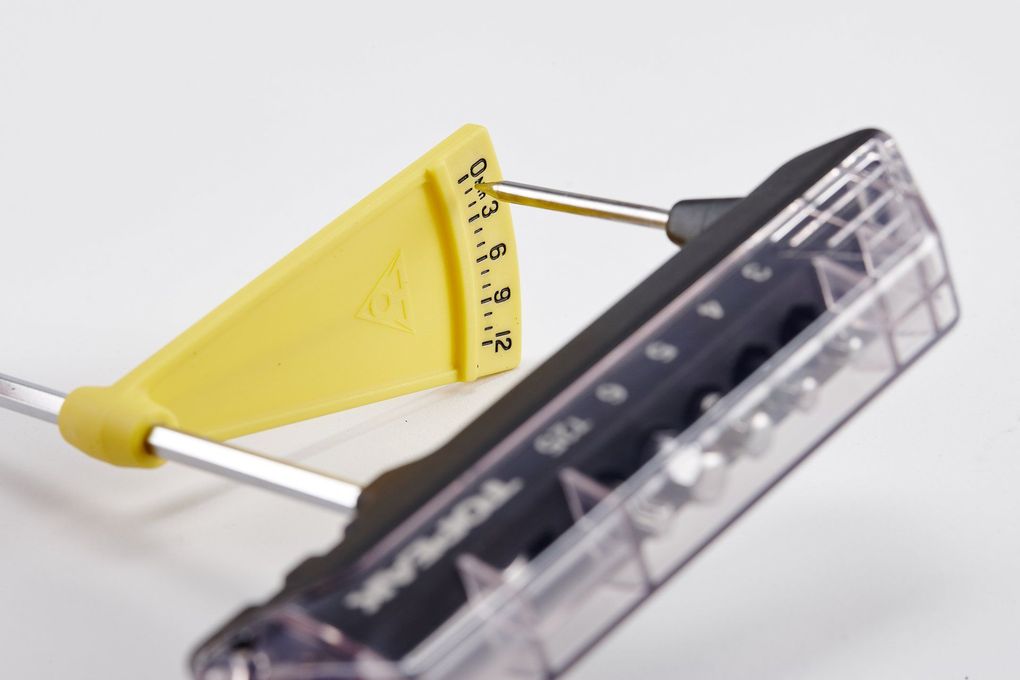
The most affordable type is a beam-type torque wrench, similar to that supplied by Canyon and also offered by other brands in Topeak.
Beam-type torque wrenches rely on deflection to measure torque
“I think for consistency and accuracy a deflection/beam torque wrench is the best,” says Noy. “You can see dynamically as you approach the torque setting, instead of relying on a click, reducing the risk of over-tightening.
“But these need to be used correctly, which comes down to applying force in the right direction and making sure the needle does not ground out on the gauge. However, they can be quite cumbersome for tight areas on the bike.”
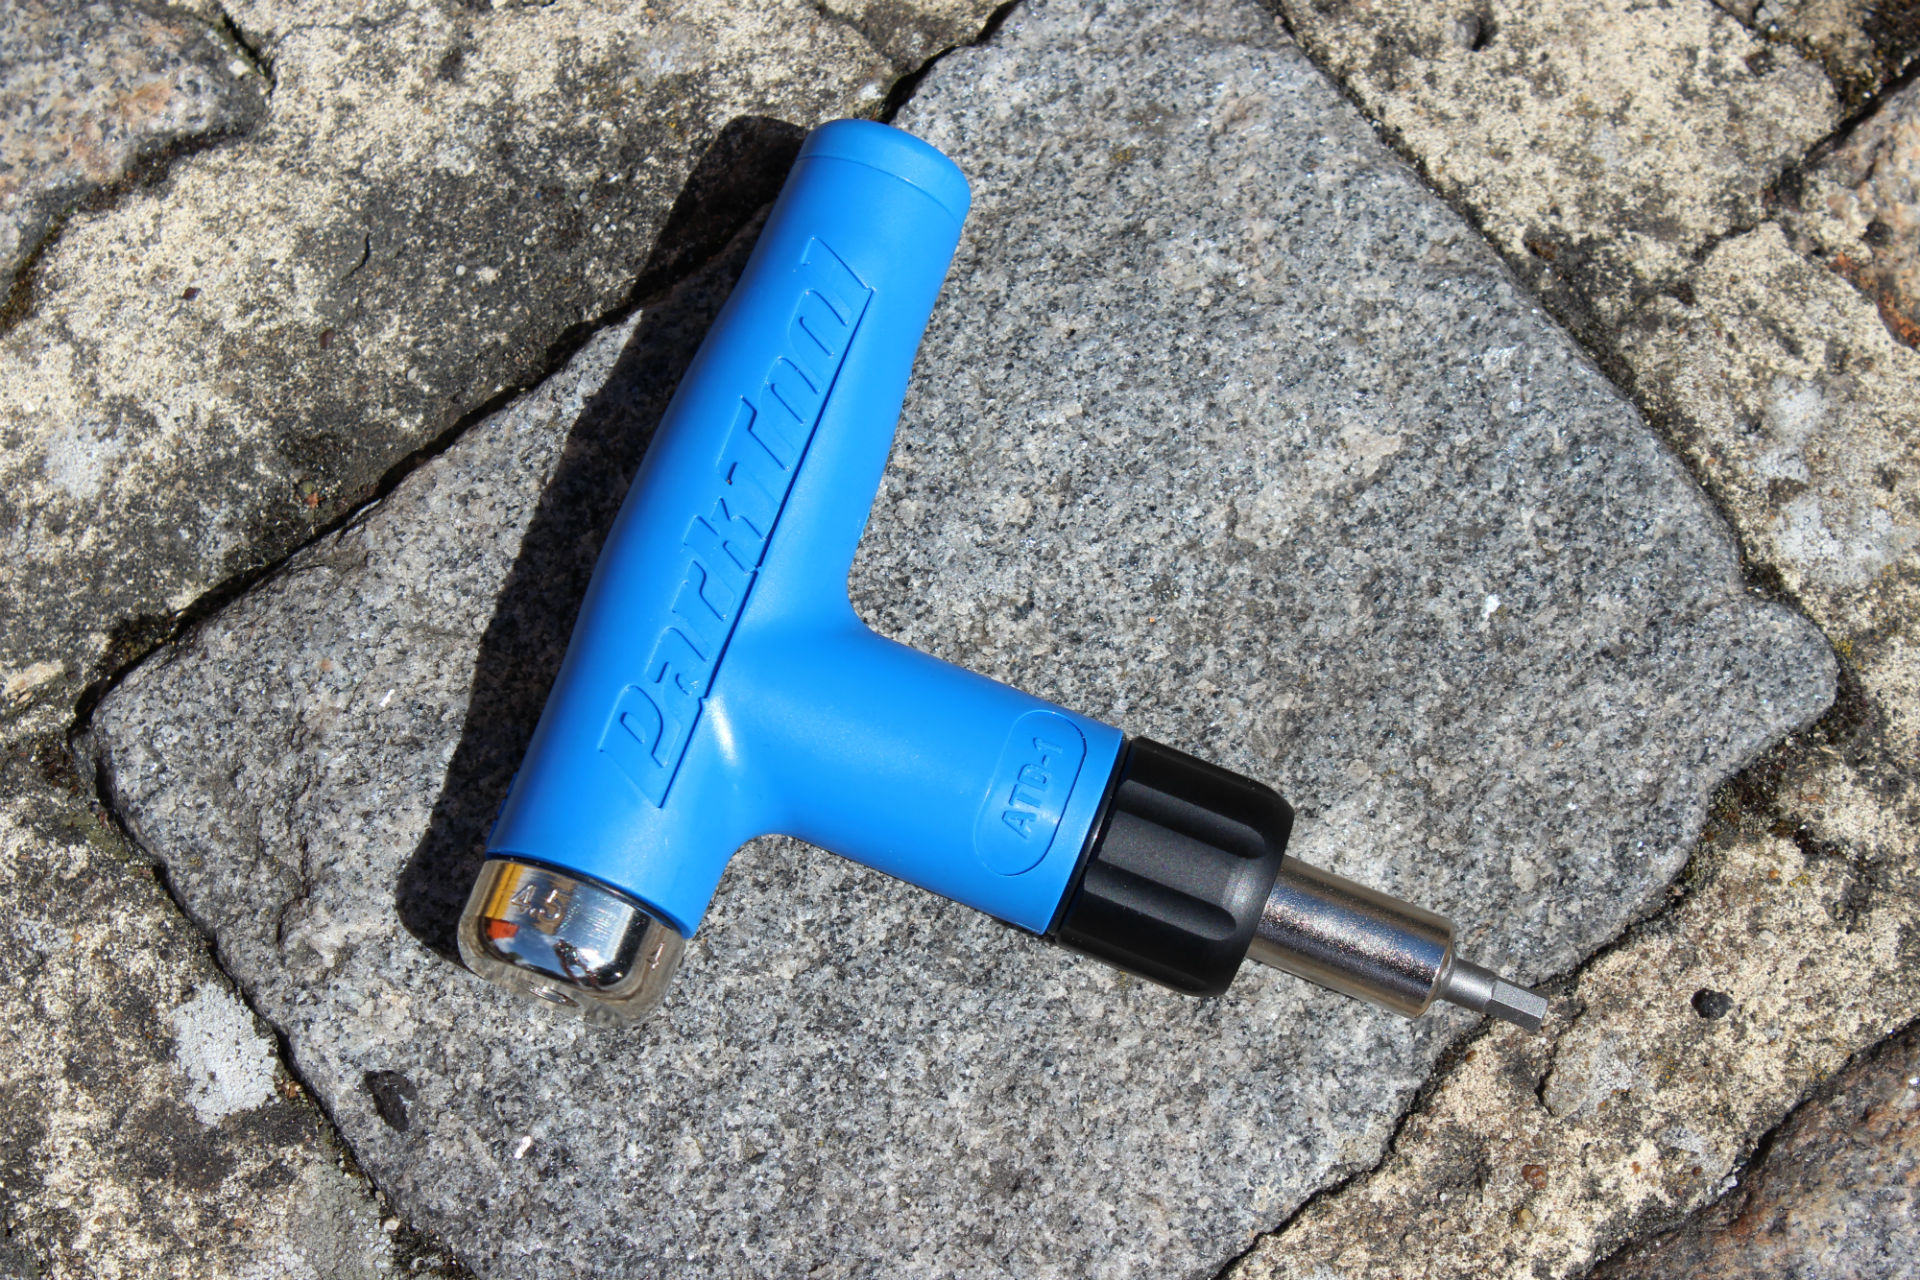
Pre-set torque keys, which have a pre-determined factory setting, will satisfy the needs of most home mechanics working with bolts with a similar torque recommendation, often 5nM. You’ll find pre-set torque drivers from the likes of Park Tool, Bontrager and Ritchey.
Park Tool’s excellent ATD-1, which featured in the RCUK 100, steps things up a notch as an adjustable, pre-set torque driver, with five settings between 4 and 6nM, and supplied with 3, 4 & 5mm Allen key and Torx 25 bits. We use the ATD-1 in the RCUK office.
We find Park Tool’s adjustable torque to be ideal for day-to-day use
If you’re serious about building bikes, then a fully fledged pro-style torque wrench will give you a wider torque range and an assortment of bits to use. Ultimately, the key, Eckart says, is choosing a setup which satisfies your needs as a home mechanic – for him, that’s a pre-set key for quick tinkering and a fully adjustable tool for serious wrenching.
“An adjustable torque wrench is definitely needed with all the different torque settings required on a bike and on the main components you’re likely to adjust,” he adds. “My go-to combination is a pre-set torque key and a fully adjustable torque wrench from Giustaforza, which covers all my needs.”
A pro-grade torque wrench, like the Park Tool TW-6, will happily handle larger parts but often aren’t necessary for most home mechanics
How do you use a torque wrench properly?
You may be thinking that it isn’t rocket science, but there are some key things to look and listen out for when using a torque wrench.
“First of all knowing when your torque wrench has gotten to the correct torque is very important,” says Trek’s Eckart. “All torque wrenches have a different sound or feel, but knowing how that ‘click’ sounds and feels is very important – because you can easily keep tightening after the wrench has met its torque setting.”
On top of that, don’t be tempted to crank things up ‘just a little more’ once you’ve reached the torque setting – trust your torque wrench, it’s what its there for.
“I also think it’s best to start at the lowest torque recommendation and go from there,” adds Eckart. “If something slips or comes out of adjustment then gradually increase torque, but never go over the maximum recommendation.”
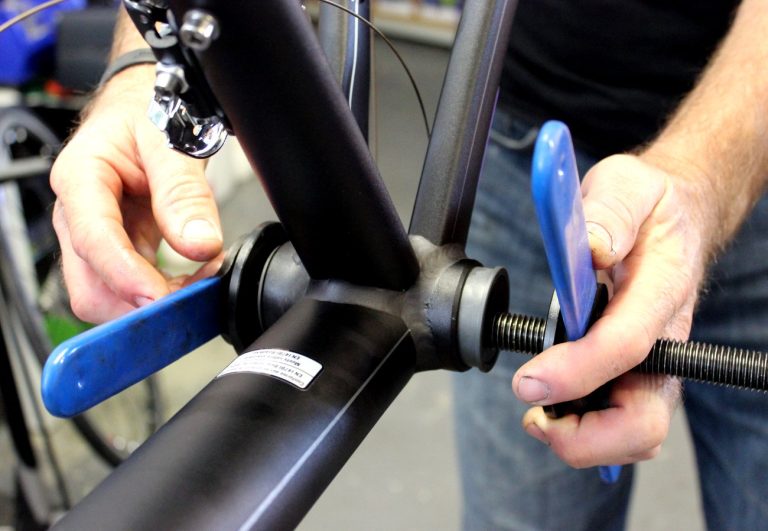
Of course, components are held by a different number of bolts in different layouts, depending on the part you’re working with. For example, a seatpost with one bolt, stem bolts with two, and a stem faceplate with four tightening points. When more than one bolt is doing the job of holding a component in place, the torque should be shared between them.
“You need to tighten these bolts a bit at a time,” says Eckart. “Fasten them like how you would put a car’s wheel back on, by gradually tightening each bolt in a criss-cross pattern. This will help distribute the load over the entire face plate [if working with a stem].”
When more than one bolt is doing the job of holding a component in place, the torque should be shared between them
Is there anything else you should pay attention to?
Noy points out that, while the torque wrench is an important and generally reliable tool, you also need to use common sense as well, particularly in relation to the quality and condition of the components and bolts you’re attempting to torque up.
“Typically, fasteners can be tightened 10% below the ‘maximum recommended’ value and still adequately secure the component. Where a range is given, for example 12-14nM, just aim for the middle value in most cases, so in this example 13nM will be fine.
“However, you need to take note of the condition the bolt and component is in, and not just for structural reasons. If the threads are covered in crusty old thread lock or corroded, then the torque reading given will not be an accurate representation of the tension on the bolt because of the excess friction on the threads.”
As a result, Noy says it’s important to make sure threads and contact points are clean and in good condition.
“A small amount of grease under the ‘head’ of the bolt prevents false readings due the excess friction, even against two clean surfaces, and should prevent ‘creaking’ in use,” Noy adds. “In a lot of cases I have found customers have had to exceed maximum torque settings to secure the part [jeopardising the part itself] because of too much friction on the threads due to dirt build-up or corrosion.”
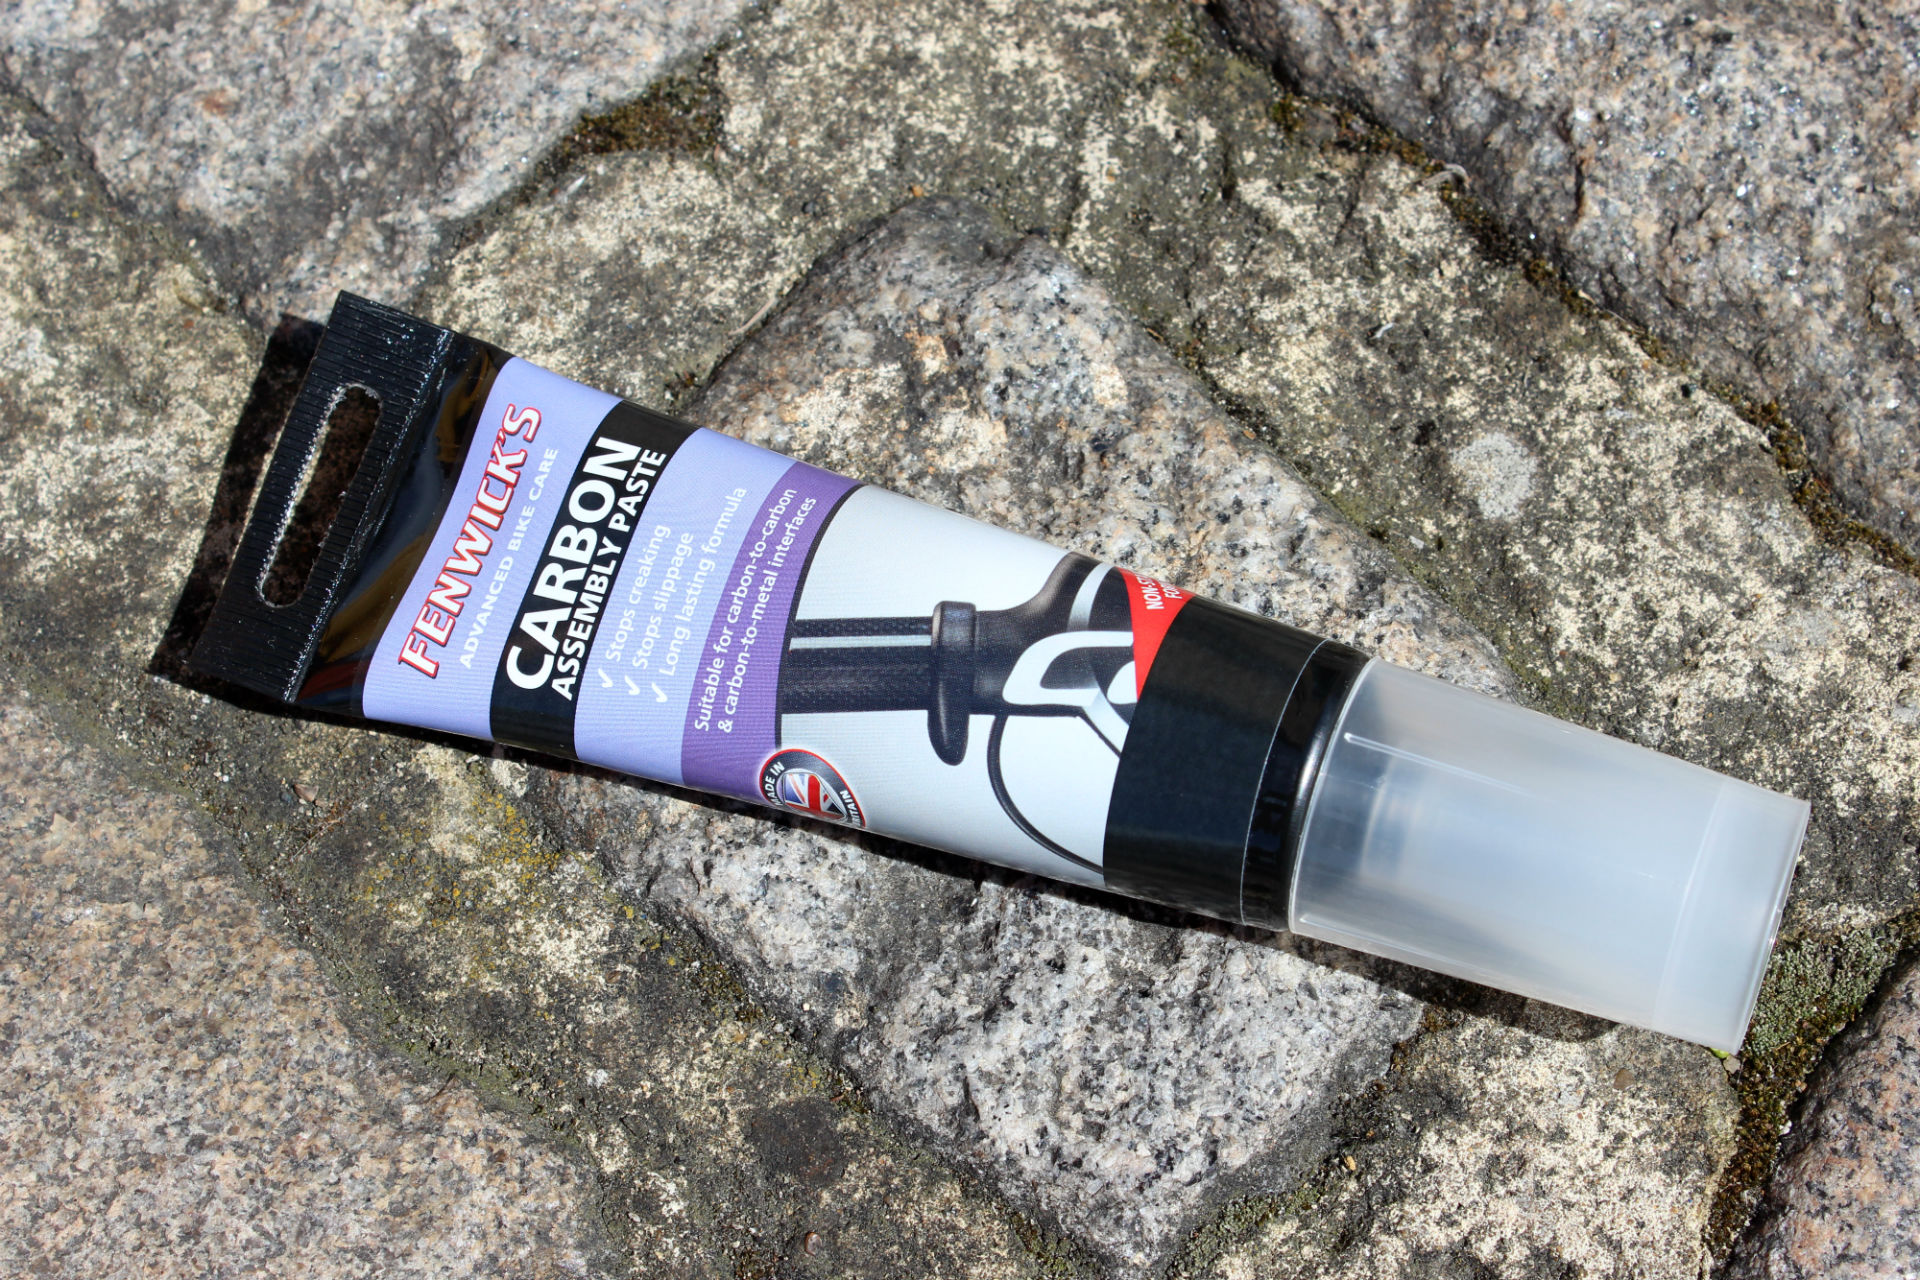
If working with carbon components, gripper paste will also help stop parts slipping
I’m assembling my bike – is there anything else I need to know?
Noy is the perfect person to answer this question, precisely because Canyon’s bikes are delivered direct-to-consumer, cutting out the bike shop in the middle that may set it up for you. While the major areas are taken care of at the factory, there are still smaller parts like the seatpost and stem faceplate that need fitting. Here he has a golden piece of advice for any home bike mechanic.
“Aside from torquing the bolt to the correct setting, another common cause of slipping components is a lack of friction,” he says. “For example, any time a carbon component is clamped – even to an alloy part – some carbon assembly paste should be used on the clamping surfaces to add friction, which will help secure the part in place.
“In some cases I see, the maximum torque setting is exceeded because of slipping components, and this can be avoided if carbon components are cleaned and some fresh assembly paste applied. The bottom line is you should never need to exceed the maximum torque setting.”